Lisias
Space Traveller Wanna-be
EDIT: New revision. See end of the post for the new features.
So, I'm using blender for my (not so advanced) mesh development needs.
Being a fan of Truespace Caligari on the golden days, I'm not exactly satisfied with it, but the thing works on my UNIX derivative box, so enough complainings.")
But recently, I got feed up of calculating Vectors and Normals by hand, and wrote some little scripts and then I thought "Hell, Blender is built over Python, why I don't write such scripting on it?" and came to this.
I found it really simple to import Orbiter meshes into Blender and then use it to setup my Camera Views and Camera Directions on it! Easier and faster than using a module to wander in the scenario, as I can position the camera precisely in Blender instead of navigating around.
For this purpose, all you need is a Python Console Window and half a dozen lines of Python code.
Now, when you need to use a _V from Orbiter, you decorate it with "from_orbiter" function. And when you want to export a result to be used in Orbiter, you decorate it with "to_orbiter" function.
Below, the steps I used to add the PAX view on TXr:
Bootstrap code. You need to type this only once per session.
---------- NEW REVISION ----------
Example for a get_vectors():
---------- NEW REVISION 2 ----------
---------- Post added at 10:21 PM ---------- Previous post was at 10:15 PM ----------
Some of you have some tricks you would want to share?
http://www.orbiter-forum.com/showthread.php?t=36375
So, I'm using blender for my (not so advanced) mesh development needs.
Being a fan of Truespace Caligari on the golden days, I'm not exactly satisfied with it, but the thing works on my UNIX derivative box, so enough complainings.
But recently, I got feed up of calculating Vectors and Normals by hand, and wrote some little scripts and then I thought "Hell, Blender is built over Python, why I don't write such scripting on it?" and came to this.
I found it really simple to import Orbiter meshes into Blender and then use it to setup my Camera Views and Camera Directions on it! Easier and faster than using a module to wander in the scenario, as I can position the camera precisely in Blender instead of navigating around.
For this purpose, all you need is a Python Console Window and half a dozen lines of Python code.
Now, when you need to use a _V from Orbiter, you decorate it with "from_orbiter" function. And when you want to export a result to be used in Orbiter, you decorate it with "to_orbiter" function.
Below, the steps I used to add the PAX view on TXr:
- Setup
- To setup a camera position:
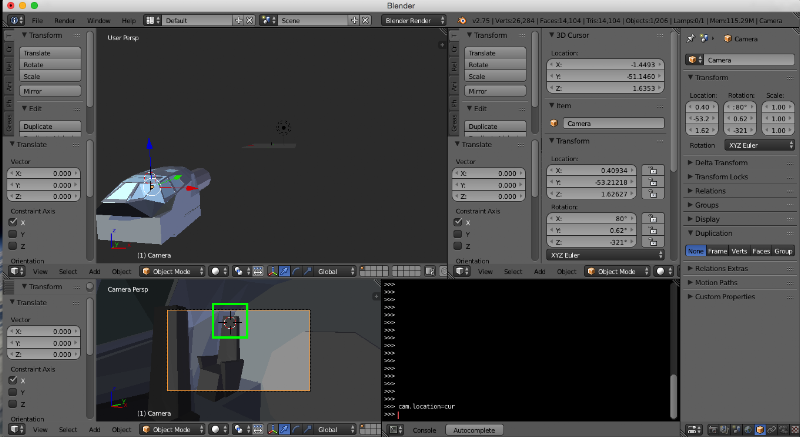
- Adjust the 3D View so you can choose a good surface, more or less near the intented Camera Location, to hop into.
- Left click on a surface so you can set the 3D Cursor there.
LINK

- Type the SetCameraPos code, so the Camera will be placed exactly where the 3D Cursor are:
LINK

- You will have something like this:
LINK
- Adjust the Trasnformation Location and Rotation until the camera is moved inside the mesh and you can see a Surface near the point you want the camera.
- Do the fine tuning of the Camera settings:
- Adjust the Trasnformation Location and Rotation until you can see a Surface near the point you want the camera.
- Left Click there to set the 3D Cursor
LINK
- Use the SetCameraPos code again.
- Repeat until you have a good view on the target.
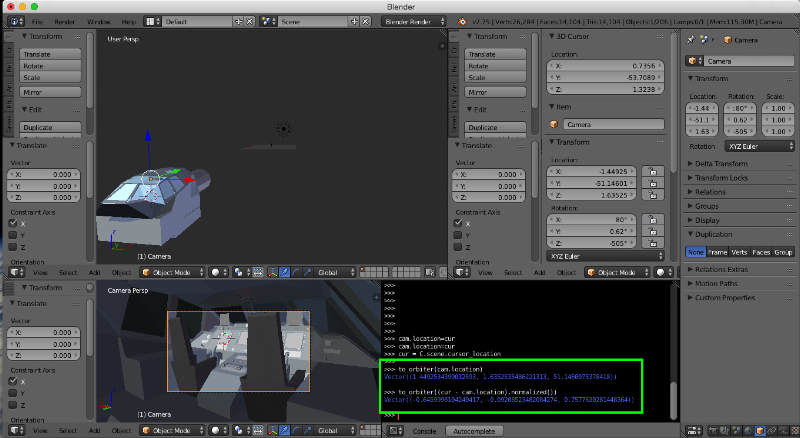
- Selecting the exact direction the Crew will be looking in Orbiter:
- Adjust the Trasnformation Rotation until you can see the Surface you want the Orbiter's Camera to be pointed to.
- Left Click on the exact point you want the Orbiter Camera looking at. This wil set the 3D Cursor there.
- Type the GetVectors code.
LINK
- Copy & Paste the data into your program.
- DONE!
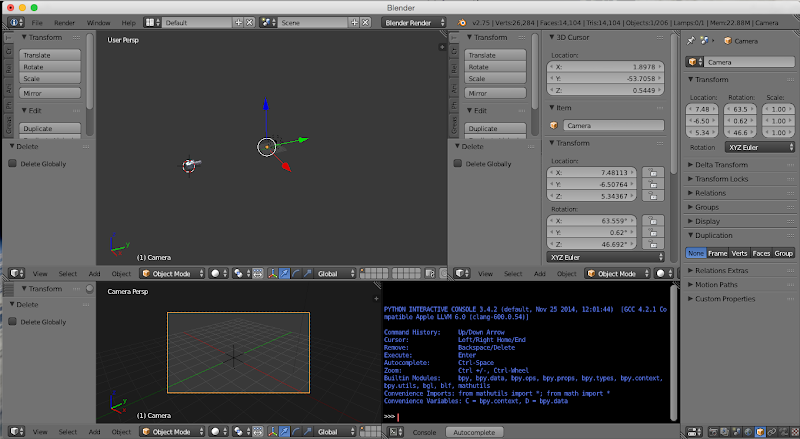

Bootstrap code. You need to type this only once per session.
Code:
import bpy
from math import acos
from mathutils import Vector as V, Euler as E, Quaternion as Q
def vector_to_orbiter(v):
return V((-v.x, v.z, -v.y))
def vector_from_orbiter(v):
return V((-v.x, -v.z, v.y))
def euler_to_orbiter(e):
return E((-e.x, e.z, -e.y))
def euler_from_orbiter(e):
return V((-e.x, -e.z, e.y))
def set_camera_pos_to_cursor(reset=False):
cur = C.scene.cursor_location
cam = D.objects['Camera']
cam.location=cur
if reset:
cam.rotation_euler=E((-pi/2, 0,0))
def set_camera_dir_to_cursor(polar = False, extern = False):
cur = C.scene.cursor_location
cam = D.objects['Camera']
loc_cam = cam.matrix_world.to_translation()
direction = cur - loc_cam
rot_quat = direction.to_track_quat('-Z', 'Y')
cam.rotation_euler = rot_quat.to_euler()
if not polar: return
normal = cam.location.normalized()
angle = pi+asin(normal.x) if extern else asin(normal.x)
cam.rotation_euler.rotate_axis('Z',angle)
def set_camera_pos(v, reset=False):
cam = D.objects['Camera']
cam.location=v
if reset:
cam.rotation_euler=E((-pi/2, 0,0))
def set_camera_dir(v, a):
cam = D.objects['Camera']
q = Q(v,a)
cam.rotation_quaternion=q
def select_camera():
for o in C.scene.objects:
o.select = False
D.objects['Camera'].select = True
bpy.context.scene.objects.active = bpy.data.objects['Camera']
def float_6(f):
return int(f*1000000)/1000000
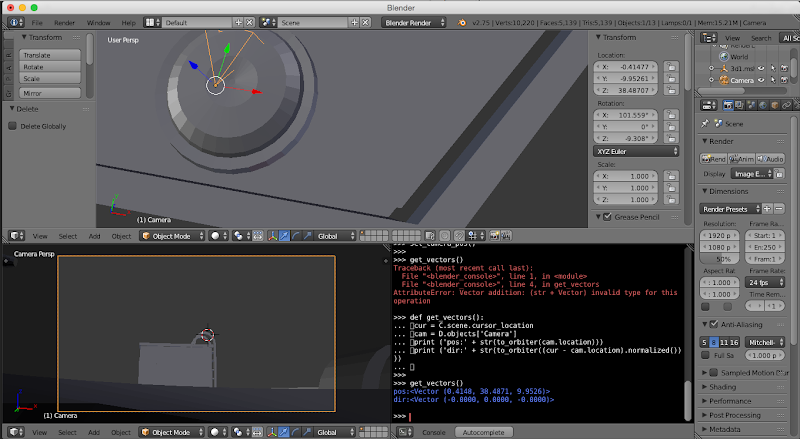
def get_vectors():
cur = C.scene.cursor_location
cam = D.objects['Camera']
loc = vector_to_orbiter(cam.location)
dir = vector_to_orbiter((cur - cam.location).normalized())
tilt = float_6(((3*pi/4)+euler_to_orbiter(cam.rotation_euler).to_quaternion().angle)%(2*pi))
print ('pos:' + str(loc))
print ('dir:' + str(dir))
print ('tilt:' + str(tilt))
print ('{{ {0.x:f}, {0.y:f}, {0.z:f} }}, {{ {1.x:f}, {1.y:f}, {1.z:f} }}, {2:f} }}'.format(loc, dir, tilt))---------- NEW REVISION ----------
- vector_to_orbiter / vector_from_orbiter : Export/import 3D vector to/from Orbiter (needed as Blender uses Right Handness and Orbiter adopted Left Handness
- euler_to_orbiter / euler_from_orbiter : Idem for Euler Angles
- set_camera_pos_to_cursor(reset = False) : Moves the Camera position to the present 3D Cursor coordinates. Using True on the reset parameter, resets the Camera direction to the equivalent to Orbiter's (0,0,-1) (default view). The parameter can be omitted, default to False.
- set_camera_dir_to_cursor(polar = False, extern = False) : sets the Camera direction looking directly to the 3D Cursor. The parameter polar when True sets also the camera's tilt for a vessel with circular hull and the pilot's seat points to outwards. The parameter extern when true sets the tilt for the pilots seat pointing inwards. Both parameters can be omitted (default False). The extern parameter is ignored when polar is False.
- set_camera_pos(v, reset=False) : Sets the Camera position directly into the coordinates given by a Vector on the first obligatory parameter. Use vector_from_orbiter to use coordinates from your Orbiter's source code vessel. The second parameter, when True, resets the Camera direction to the equivalent to the Orbiter's -Z axis. If omitted, False.
- set_camera_dir(v, a) : Sets the Camera direction using an Axis Angle tuple. v is a 3D Vector (use vector_from_orbiter to import a coordinate from your Orbiter's vessel), a is a float with the angle in radians.
- select_camera() : deselects all the objects and selects the Camera.
- get_vectors() : Prints on the console the Camera Position, Direction and Tilt suitable to be used on Orbiter's vessels. See below for an example.
Example for a get_vectors():
Code:
pos:<Vector (16.1810, -1.4965, -3.0720)>
dir:<Vector (-0.5214, 0.1745, -0.8353)>
tilt:4.743462
{ 16.181000, -1.496500, -3.072000 }, { -0.521386, 0.174479, -0.835293 }, 4.743462 }
---------- NEW REVISION 2 ----------
- Updating select_camera() to make the Camera the current object on Properties View, so you can move it around too.
- Minor optimization on calculating the Tilt.
---------- Post added at 10:21 PM ---------- Previous post was at 10:15 PM ----------
Some of you have some tricks you would want to share?
http://www.orbiter-forum.com/showthread.php?t=36375
Last edited: