You are using an out of date browser. It may not display this or other websites correctly.
You should upgrade or use an alternative browser.
You should upgrade or use an alternative browser.
Apollo 15: Lunar Ascent Preparation and RTCC Procedures?
- Thread starter Wedge313
- Start date
Wedge313
Well-known member
Your thoughts on my screen resolution being an issue might be on target.
This morning I ran about six different P57s, experimenting with the screen resolution. My laptop's highest resolution is 1366 x 768. I can lower that to 1280 x 720, but it turns out that the Video setting in Orbiter overrides that.
Because of my laptop's resolution my screen doesn't look exactly like yours. The views of the AOT gets "cut off" a bit. (I need to scroll to see the RR Gyro Switch.) But I was careful not to accidently scroll while making my marks.
With the Orbiter Video set at 1366 x 768 the AOT FoV actually defaults to 45.79 (read off the camera FoV). I ran P52 using Navi (03) and detent 02 and got a star angle difference of -00006. I thought I was on the right track, but to check it I tried Rigel (12) in detent 06, and got +00022. I figure that if I'm doing this correctly it shouldn't matter what star I use, the angle difference should be fairly consistent.
I tried making sightings with the AOT FoV set to 60. Star 03 detent 02 gave me +00074. Star 12 detent 06 gave me -00314. So I don't think using FoV 60 helps.
Then I thought I'd try setting the AOT FoV to exactly 46 using the Camera FoV. Star 03 detent 02 gave me -00005. Then I tried star 12 detent 06, and got -00001 (!). So finally some repeatable results. As a further check I tried star 20 (Dnoces) detent 04 and got +00006.
So if I set the AOT FoV to exactly 46 I seem to be able to get good results using different stars. Adjusting the FoV from 45.79 to 46.00 makes a big difference. I don't know if this is an acceptable resolution to my issue, but it seems to be better than where I was before.
EDIT: Thank you for the step-by-step procedure. I think I've been following these steps in my previous attempts, nothing here looked or felt different to me. But following them gave me a sense that procedurally I'm OK, so it might be something else.....
Attachments
![Orbiter 2016 [D3D9Client] 1_10_2022 4_38_41 AM.png](https://cdn.orbiter-forum.com/data/attachments/27/27493-443a8a675dc01cc821c6b2bec3a93986.jpg?hash=RDqKZ13AHM)
![Orbiter 2016 [D3D9Client] 1_10_2022 4_38_19 AM.png](https://cdn.orbiter-forum.com/data/attachments/27/27494-133cad81a160a0c3253f99e6b1774a6d.jpg?hash=EzytgaFgoM)
![Orbiter 2016 [D3D9Client] 1_10_2022 4_35_39 AM.png](https://cdn.orbiter-forum.com/data/attachments/27/27495-1413e80c2e26cc0d5af93cf0e9b7308f.jpg?hash=FBPoDC4mzA)
Last edited:
Yeah if you arent running 1920x1080 this will make things worse haha. I originally wrote that based on an "expected" 1920x1080I tried making sightings with the AOT FoV set to 60. Star 03 detent 02 gave me +00074. Star 12 detent 06 gave me -00314. So I don't think using FoV 60 helps.
Then I thought I'd try setting the AOT FoV to exactly 46 using the Camera FoV. Star 03 detent 02 gave me -00005. Then I tried star 12 detent 06, and got -00001 (!). So finally some repeatable results. As a further check I tried star 20 (Dnoces) detent 04 and got +00006.
Hmm this is interesting, I will bring it up and see if this could be a difference. But it is supposed to compensate your camera view for your screen resolution...so odd resolutions might be causing that.So if I set the AOT FoV to exactly 46 I seem to be able to get good results using different stars. Adjusting the FoV from 45.79 to 46.00 makes a big difference. I don't know if this is an acceptable resolution to my issue, but it seems to be better than where I was before.
I still think accidental scrolling could be a variable in this as its so easy to do, but I think you have narrowed down some mitigation and, if the procedure is right, and your angles are reasonable, I say press on. You will do 1 more P57 before launch I believe as well.
EDIT: One thing I will add is you should leave it to whatever it defaults to (45.79) as that is mathematically calculated to be correct. I think the angle differences between that and 46 are likely just differences in technique based on talking to some of the team.
Last edited:
Wedge313
Well-known member
Well, I want to get this right, so back to the wonderful world of P57...EDIT: One thing I will add is you should leave it to whatever it defaults to (45.79) as that is mathematically calculated to be correct. I think the angle differences between that and 46 are likely just differences in technique based on talking to some of the team.
I think I've got my issue worked out, and it is my technique- with a caveat.
On my screen some of these Apollo nav stars are not too bright. When I've been making my sightings, unless the star was very obvious, I've been inadvertently placing my cursor or spiral over the center point of the green crosshairs. The problem there is that looking closely I noticed the star is not always centered in the crosshairs (at least not on my screen). It's not a big difference but I think that has been my problem.
So this morning I ran four P57s. I left the FoV at the default value of 45.79. But this time looked at my screen with a magnifying glass, making sure I was placing the cursor or spiral over the star. Using this "technique" I got four good results using two different stars (Navi and Rigel), two sightings each. My worst star angle difference was +00003.
I'm thinking that by fudging the FoV to 46.00 I inadvertently compensated for my incorrect centering (using crosshairs vs. actual star).
I'm a little surprised that those tiny differences made such big errors in my star angles. But I think that's what I was doing wrong.
Funny thing is, the center point of the marker is where the star was during Apollo. The stars in orbiter are where they are now, so you SHOULD be using the center point of the markerOn my screen some of these Apollo nav stars are not too bright. When I've been making my sightings, unless the star was very obvious, I've been inadvertently placing my cursor or spiral over the center point of the green crosshairs. The problem there is that looking closely I noticed the star is not always centered in the crosshairs (at least not on my screen). It's not a big difference but I think that has been my problem.

But in any case anything less than 00010 is perfectly acceptable for a gravity/star alignment.
Wedge313
Well-known member
I think it might be more an issue with my laptop? To be clear, the stars are always within the crosshairs, I'm only talking about minor deviations from dead center. I played around with it this morning and sometimes when I started the marking sequence the star (let's use Navi as an example) might be slightly off center, low and right. The second time through Navi might appear low but centered left/right. A third time it was almost perfectly centered. So it's not consistent.
It's really small differences, but I think it was enough to affect my marks? Making sure I centered on the star exactly seemed to help my marks.
It's really small differences, but I think it was enough to affect my marks? Making sure I centered on the star exactly seemed to help my marks.
Attachments
![Orbiter 2016 [D3D9Client] 1_11_2022 5_19_58 AM (2).png](https://cdn.orbiter-forum.com/data/attachments/27/27510-5093c991c83b3a1da90319ecb8f0553a.jpg?hash=UJPJkcg7Oh)
![Orbiter 2016 [D3D9Client] 1_11_2022 5_11_24 AM (2).png](https://cdn.orbiter-forum.com/data/attachments/27/27509-1401ab93f7f3514c4e2dc08009b9dfa5.jpg?hash=FAGrk_fzUU)
![Orbiter 2016 [D3D9Client] 1_10_2022 4_38_19 AM.png](https://cdn.orbiter-forum.com/data/attachments/27/27508-c9017ac59f9ca30fbba138ef11f34af9.jpg?hash=yQF6xZ-cow)
![Orbiter 2016 [D3D9Client] 1_10_2022 4_38_41 AM.png](https://cdn.orbiter-forum.com/data/attachments/27/27507-4628d5fc96468e6041bce91a2489be24.jpg?hash=RijV_JZGjm)
Honestly, given you are on a laptop screen, you should be perfectly fine here based on your results. Yes the stars should be within the crosshairs, but the distance from center is the difference in star location between then and now. Also any zooming/fov change will also mess with the perceived position.I think it might be more an issue with my laptop? To be clear, the stars are always within the crosshairs, I'm only talking about minor deviations from dead center. I played around with it this morning and sometimes when I started the marking sequence the star (let's use Navi as an example) might be slightly off center, low and right. The second time through Navi might appear low but centered left/right. A third time it was almost perfectly centered. So it's not consistent.
It's really small differences, but I think it was enough to affect my marks? Making sure I centered on the star exactly seemed to help my marks.
I think you can put this baby to bed as you have a good internalization of what you are doing with P57, and you seem to be getting good marks. You still have a rendezvous to contend with
")
Wedge313
Well-known member
Moving on, time to program the AGS. Some of these entries come off the ascent PAD (224/226, 231).
The PAD also had values for DEDA 047 and 053. I don't see where on the Lunar Surface Checklist I should enter these? I see later we will read them out, but not sure if this is an input.
Entry 232 (targeted injection alt) I think is going to be around 60 (?) but where would I get the correct value?
465 we left at 32.
When I do 514R, 515R, and 516R the coordinates are all zeros. What should I see here?
307 (trans time TPI to Rendz) I believe I came up with during the ascent planning, mine was 45.06
373 has me stumped. Looking at the AGS manual it can refer to many things (CSI, CDH, TPI, Ext dV), not sure what I do here.
Thanks.
Ok AGS stuff! I love the AGS haha. So 224/226 are basically your orbital target. Essentially if the AGS flew your ascent where it would take you WRT the moon.Moving on, time to program the AGS. Some of these entries come off the ascent PAD (224/226, 231).
231 is the landing site radius (where you are with respect to the center of the moon.)
You actually don't enter these in this case on the checklist, they are for comparison. You are to compare your DEDA 047 and 053 addresses to the pad values and they should be close. These values are set in the AGS after you align the AGS to your PGNS. In some cases Houston did ask for changes to these values like on Apollo 15 though so you are welcome to change them if different.The PAD also had values for DEDA 047 and 053. I don't see where on the Lunar Surface Checklist I should enter these? I see later we will read them out, but not sure if this is an input.
232 should already be padloaded. This is your targeted altitude in 100 ft. You can use the value that's already stored which should match the value on the checklist (+00600)Entry 232 (targeted injection alt) I think is going to be around 60 (?) but where would I get the correct value?
Correct +00320465 we left at 32.
Ah these values are used to provide a yaw steering wrt the orbital plane. For example if you needed some left yaw during ascent to face the steerable antenna towards earth, this would hold that yaw during ascent. In the PGNS you can simply yaw and it will hold it but the AGS will if you set out of plane steering (623+1) and use those values which would be read up if non zero as they are octal. I need to hunt for the values for Apollo 15 since they did have a 40 degree yaw during ascent.When I do 514R, 515R, and 516R the coordinates are all zeros. What should I see here?
If you fly Apollo 16 you will see this in action flying the actual mission as their steerable got stuck so they had a large yaw during ascent to keep it pointed to earth.
Yep that will work, 307 is in 0.01 minutes.307 (trans time TPI to Rendz) I believe I came up with during the ascent planning, mine was 45.06
Oh that's just AGS TIG, so it applies to any maneuver. Its basically which AGS time you plan to burn. So you just compute your TIG in AGS time.373 has me stumped. Looking at the AGS manual it can refer to many things (CSI, CDH, TPI, Ext dV), not sure what I do here.
If your liftoff time is 172:00:00 then you just apply your AGS bias to it so it would be 120.0 minutes or DEDA +01200
Also the G&N Dictionary has a bunch of good AGS information. Hope this helps!
EDIT: The octals for the out of plane yaw are in your checklist actually in parenthesis.
514 -53334
515 -47371
516 +00000
Last edited:
Wedge313
Well-known member
What am looking at/looking for reading the tweak burn MSK 0063 page? This is the first time I've gotten this far, not sure what it all means.
And once I know what I'm looking at, could you walk me through the burn procedure?
Thanks
And once I know what I'm looking at, could you walk me through the burn procedure?
Thanks
So are you still pre liftoff or post insertion?What am looking at/looking for reading the tweak burn MSK 0063 page? This is the first time I've gotten this far, not sure what it all means.
And once I know what I'm looking at, could you walk me through the burn procedure?
Thanks
If pre liftoff, you don't need to worry about calculating this yet, you just preload the values you have calculated.
Post liftoff, you will essentially hold insertion cutoff attitude...I have pasted the procedure from the timeline book.
Once you complete the steps to "Go no-go for tweak" you start P47, clear your dv counters in the AGS (404/405/406 +00000) calculate those tweak burn values (remember we didn't do that step yet, we only preloaded the data) and then you can use the dv on P47 or on the AGS to burn your dvx/y/z.
EDIT: Not enough coffee, forgot the attachment...
Attachments
Last edited:
Wedge313
Well-known member
Right after insertion, just did the TAR->REN->TI->DIS->CLC->MPT->CLC and I looking at a line of numbers on MSK 0063 that I don't really know what to make of. I was hoping to see something in the DVX, DVY, DVZ variety, but I'm not sure what I'm looking at?So are you still pre liftoff or post insertion?
You should have a TIG and DVX DVY DVZ in the bottom right.Right after insertion, just did the TAR->REN->TI->DIS->CLC->MPT->CLC and I looking at a line of numbers on MSK 0063 that I don't really know what to make of. I was hoping to see something in the DVX, DVY, DVZ variety, but I'm not sure what I'm looking at?
Can you send me a post insertion scn I will check it.
Last edited:
Wedge313
Well-known member
Bottom right of what? I lied earlier, it turns out I'm missing the last two steps of TAR->REN->TI->DIS->CLC->MPT->CLC . I get to TAR->REN->TI->DIS->CLC, and that's as far as I've been able to get. I can't figure out the MPT>CLC part. I'm on the MASK 0063 page and not sure where I go for "MPT" .You should have a TIG and DVX DVY DVZ in the bottom right.
I'm hesitant to share the .scn, this was my first go-through and I'd be embarrassed to share it.

No reason to be embarrassed! I just didn't have a save for insertion and Apollo 15 handy.Bottom right of what? I lied earlier, it turns out I'm missing the last two steps of TAR->REN->TI->DIS->CLC->MPT->CLC . I get to TAR->REN->TI->DIS->CLC, and that's as far as I've been able to get. I can't figure out the MPT>CLC part. I'm on the MASK 0063 page and not sure where I go for "MPT" .
I'm hesitant to share the .scn, this was my first go-through and I'd be embarrassed to share it.
With MPT inactive, and after insertion cuts off, you TAR->REN->TI->DIS->CLC Then ENG, choose L2 (LM RCS 4 jet), and hit CLC for your DVs
Wedge313
Well-known member
There it is!
Question: After shutdown the checklist has us null residuals, then we look at the tweak burn. Why did they do it like that (two steps) instead of skipping the nulling part and just going straight into the tweak calculation? Wouldn't the tweak burn combine both?
Thanks.
Question: After shutdown the checklist has us null residuals, then we look at the tweak burn. Why did they do it like that (two steps) instead of skipping the nulling part and just going straight into the tweak calculation? Wouldn't the tweak burn combine both?
Thanks.
Good question indeed. My first guess is typically you null out a maneuver because the tweak burn takes into account the expected insertion when calculated. But others can probably correct me on this one.There it is!
Question: After shutdown the checklist has us null residuals, then we look at the tweak burn. Why did they do it like that (two steps) instead of skipping the nulling part and just going straight into the tweak calculation? Wouldn't the tweak burn combine both?
Thanks.
- Joined
- Oct 26, 2011
- Messages
- 1,264
- Reaction score
- 727
- Points
- 128
Yeah the tweak burn fixes the trajectory to properly intercept the desired point of the TPI maneuver relative to the CSM. If the APS engine had a different performance than expected for example then the precisely calculated liftoff time wouldn't be correct anymore for the intercept and rendezvous. So the tweak burn can account for that, while nulling the P12 residuals is just fixing the cutoff errors relative to the targeted insertion conditions (horizontal and vertical velocity). So it doesn't take the rendezvous into account, while the tweak burn does.
Wedge313
Well-known member
It's not pretty, but somehow I'm managing to rendezvous. Between the LM AOH, G&N manual, Timeline book, and Flight Plan (combined with a ton of trial and error) there's enough information to get through the whole procedure. But I will have to go through it again a number of times to figure out how to do it correctly.
First area I need to clean up is the AGS. I haven't figured out how to set it up before launch, it's basically just dead weight.
I'm shaky on the RTCC/ tweak burn set up. Even though I "pre-set" the TAR>REN stuff it seems like I have to go through the whole RTCC ascent procedure to get tweak values. (Before lift off, should the MPT be active or inactive?)
Should I be breaking RR lock when I do the TPI and MCC burns? Going from P34 to P42 I get an F 50 18 that orients me out of lock for the burn, then another F 50 18 to re-orient back when I start P35. Similarly with the two MCCs. Doesn't seem like I'm doing that correctly.
And after the second MCC, what should I be doing for orientation? I've been popping back into P35, which orients me back to pointing at the CSM (that's actually P20 kicking back in I think). Do I leave P20 running and let it point me at the CSM? It seems to work out OK but it just feels wrong.
I have a million questions and feel like I'm reaching the end of my self-teaching ability. Has this sequence of events (direct ascent) been discussed in any other threads? You've probably covered this before, and I'd like to read through other people's experiences before I burden you by asking to provide me with a lengthy step-by-step walk through.
But as always any advice is appreciated.
Thanks.
Attachments
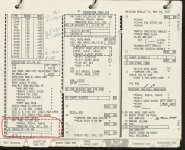
![Orbiter 2016 [D3D9Client] 1_19_2022 8_05_04 AM.png](https://cdn.orbiter-forum.com/data/attachments/27/27635-b5aadbc6665667cbe001bea9052dd9c4.jpg?hash=tarbxmZWZ8)
Totally normal, lots of retries and saves are a powerful learning tool.It's not pretty, but somehow I'm managing to rendezvous. Between the LM AOH, G&N manual, Timeline book, and Flight Plan (combined with a ton of trial and error) there's enough information to get through the whole procedure. But I will have to go through it again a number of times to figure out how to do it correctly.
Honestly, as much as I love using the AGS, for your first few attempts I would focus on the PGNS. Once you have a PGNS rendezvous mostly down then start learning what the AGS is doing side by side.First area I need to clean up is the AGS. I haven't figured out how to set it up before launch, it's basically just dead weight.
Hmm you should be able to go to the CLC page and just calculate it. MPT should be inactive and all of your parameters loaded before liftoff.I'm shaky on the RTCC/ tweak burn set up. Even though I "pre-set" the TAR>REN stuff it seems like I have to go through the whole RTCC ascent procedure to get tweak values. (Before lift off, should the MPT be active or inactive?)
This one is tricky and I have yet to figure out the actual maneuver, but there is a "yaw/roll maneuver" that is performed here manually to orient to the burn attitude while maintaining radar lock. Letting the computer do it will break lock and they had a trick to it. I need to go back and figure that one out for sure. Don't sweat breaking locks though, crews had it happen often enough IRL and it was a simple case to relock and resume marking.Should I be breaking RR lock when I do the TPI and MCC burns? Going from P34 to P42 I get an F 50 18 that orients me out of lock for the burn, then another F 50 18 to re-orient back when I start P35. Similarly with the two MCCs. Doesn't seem like I'm doing that correctly.
For the MCC's, since they are small and don't require APS, you should be burning them in P20 tracking attitude, skipping the auto maneuver and then just using RCS to null X Y Z.
After MCC2 you just bring P20 back up, you will see a little handwritten note in the LM Timeline (attached).And after the second MCC, what should I be doing for orientation? I've been popping back into P35, which orients me back to pointing at the CSM (that's actually P20 kicking back in I think). Do I leave P20 running and let it point me at the CSM? It seems to work out OK but it just feels wrong.
This is the most challenging aspect of the flight imo, takes the most work as you are taking the workload of multiple people and performing it all at once with little automation. I don't know of any direct ascent walkthroughs on here as there aren't too many who have ventured off of the missions with MCC support, so this is probably the first good one!I have a million questions and feel like I'm reaching the end of my self-teaching ability. Has this sequence of events (direct ascent) been discussed in any other threads? You've probably covered this before, and I'd like to read through other people's experiences before I burden you by asking to provide me with a lengthy step-by-step walk through.
Keep at it and you will start getting procedures down and be able to fly this without breaking too much of a sweat
Attachments
Similar threads
- Replies
- 7
- Views
- 4K
- Replies
- 1
- Views
- 2K