After getting the hang of re-entry, i thought id put up a post giving a simple way to re-enter, helping you on your way to making your own entry technique.
I'll try to make it all grammatically correct without any mistakes, if there's any problems, just reply to this thread or message me, and ill see what I can do.
OK, here goes!
I suggest using the DGIV-2 for this, as its autopilot can make your job much easier, and some HUD data is very useful, so for simplicity, i will assume that you already have it, if not, go here and download at least the DGIV-2 (these are good add-ons, i suggest getting all of his Add-ons, all 4 that appear at the top of this page (NOTE UMMU is included with UCGO), although, this is just my opinion)
NOTE: when I refer to the 'DGIV Display', I am referring to the screen in the middle of the panel, which has a Spacetech logo and some copyright text when you first start the scenario. any commands I give to select the mode will be given in the format 'd65', where any letter is what you should press on your keyboard, and any number you should press on the upper keyboard (not the number pad). any autopilot commands (such as changing the AoA during re-entry autopilot) MUST be pressed on the number pad (this EXCLUDES autopilot programs themselves, which are input into the console EG 'pro104spec40' these are input using the keyboard numbers, not the numpad numbers. when typing the program in, DO NOT press 'P-R-O-1-0-4-S-P-E-C-4-0', BUT RATHER "P-1-0-4-S-4-0").
1) this requires you to download the Aerobrake MFD and the Basesync MFD, here's some links to the very same that I use:
Basesync, used to align your orbit over the target base- BaseSync MFD
Aerobrake, used to calibrate your braking descent to your target base- Aerobrake MFD
(if any links don't work, let me know and ill get them working ASAP )
)
2) install both MFDs, and ensure that both are enabled in the "Modules" tab of the Orbiter launchpad
3) launch a suitable scenario (EG- DGIV docked to ISS), undock from anything you are docked to, and get ready to rock- open the Basesync MFD and the orbit MFD. IMPORTANT use the fuel management system to get your ships weight under 19,000KG, else your autopilot will not work later. changing the DGIV custom HUD to mode 2 gives you a large readout of ship weight, use this and your main fuel dump (CTRL+ Down arrow- on the left hand side of the panel- labelled 'Main Fuel Dump') to lose enough fuel, you MUST have less than 19T by re-entry
4) on the Basesync MFD, select TGT and enter your target destination
5) select E/D (left hand side) so that the dashed blue line is perpendicular to the yellow line.
6) accelerate time until you approach one of the nodes, then go back to 1x time ABOUT 10* BEFORE THE NODE and turn to orbit normal (depending on the symbol next to the PIC readout near the upper right corner, if it shows a + sign before the node, turn to orbit normal +, if its a - sign before the node, turn to orbit normal -. (older versions of the MFD may have a bug that causes the Tn to only apply to the LAST node passage, in which case, turn opposite to what it suggests. if you used teh above link to get the MFD, dont worry about this, the bug was fixed)
7) burn till the R-Inc value (top right corner) is close to 0, and the Dist value for the highlighted line at the bottom of the MFD is less than 10k (this is the closest distance you will pass by your target on the selected orbit)
8)go to 100x warp until the highlighted line is on line 1 (the top), then go back to 1x to program a de-orbit position
9) select DEO (lower right corner) to open the de-orbit display, then select ALT, and enter 90 into the box, then select ANT and enter 45, then select your desired entry angle (if unsure, enter 0.7)
10) you now have your de-orbit position, this will be correct for your current altitude BUT YOU MUST HAVE A LOW ECC VALUE BEFORE YOU CAN RELY ON THE POSITION (keep it less than 0.05 ideally) time warp to the position
11) as you approach, open the DGIV's de-orbit display (press d then 2 on your keyboard) and turn retrograde to prepare to de-orbit
12) as you pass the white line on the de-orbit display, begin to burn your main engines, watch your PeA (or PeD, I forget :S) and make sure it is decreasing, or else you are burning prograde or normal, you want neither of these.
13) once your orbit on the orbit MFD hits the atmosphere, the entry angle on the central display will rapidly count upwards, stop as close as you can to 0.7, then use lin thrusters (RCS- press numpad /, then numpad 6 or 9) to fine tune it, use CTRL-[direction] for ultra fine tuning. it doesn't matter if you're a little out, but its best to be exactly on it to reduce your total error margin.
turn off the De-orbit display (press DEO) again and time warp until you approach the final node before landing, this is the node 90* from your target, usually ~90* from your de-orbit position. then you should re-align your flightpath, turning to orbit normal or anti-normal (as required) and burning until the DIST readout on the highlighted line (MUST BE THE TOP LINE AT THIS STAGE) is close to 0.
14) engage surface HUD, engage prograde, then MANUALLY level out and pitch up to ~40* (the autopilot manages to use a huge amount of fuel if you just skip to the next step)
15) press d1 to return to the program display on the DGIV display, then press c to unload your previous program. next use autopilot 'pro104spec40' (or press p104s40 <enter> on your keyboard) then hit e.
16) your autopilot will automatically set your angle of attack to 40*, this is how you will stay to about 68KM ALT (but don't time warp there yet).
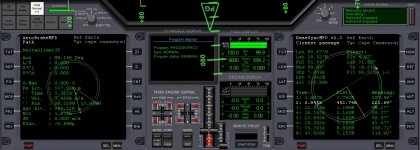
17) change the right MFD to surface (yes, surface) so you can see your speeds and accelerations, and change the DGIV display to re-entry check (press d65). this will tell you everything you need to do before re-entry (most important are: nosecone being open, excess weight, but others still need to be done)(if you are over max entry weight, you didn't dump enough fuel, do it NOW!)
18) continue running the auto checklist (d65) and correcting and mistakes in your configuration till you get 'configuration OK' message, then set the display to re-entry data (d3)
19) time warp forward till the DGIV autopilot says you cant use time warp anymore, set your left MFD (not the one currently set to 'surface') to Aerobrake MFD and set the target to the target you defined for the Basesync, then wait till you drop to 70km ALT, this is when you start to control your descent.
20) use the autopilot to keep your descent rate as close as possible to -80M/s Vertical speed. i use the VACC (vertical acceleration) to do this. by pressing 8 (numpad) the vertical speed (and acceleration) moves upwards as you pitch down (more lift generated by the wings), and as you press 2 (numpad)you descend faster, as less lift is generated by the wings. the re-entry display tells you the atmospheric pressure, the higher this is, the more effective your airfoils, and so you should find that you pitch down gradually throughout the descent
NOTE the DGIV autopilot currently only works in 5* steps for the angle of attack (AoA), this is far too much for a smooth entry, you will find that you have to repeatedly move between two values to keep your speed from changing too much.
if your vertical speed gets lower than -90M/s, your hull will heat dramatically in a few minutes time, and if you notice this heat rise, its probably too late to fix it. alternately, if your vertical speed rises as high as -60M/s, you are in danger of bouncing off the denser layers of the atmosphere as you hit them, ruining your good de-orbit position. aim to keep it between -70 and -80, this keeps you on a good enough trajectory. it doesn't need to be perfect, because the final step in this process ensures that you go over your target.
21) keep this target descent rate until you notice your speed reach around 2K M/s (Mach 6) at this point, pay close attention to your Aerobrake MFD, this is all you will use for your final approach to target. looking at the grid in the upper right corner (if you have a display with the earth and your path in relation to a cross section, press PRJ and PG to obtain the map view, if you still dont have it, press PG until your top line reads "Graph/Map" then press PRJ untill a map view appears), it shows your target as the central square, and each Gray grid square us roughly 120km over the surface. pressing 8 (numpad) will extend your glide further, do this until you see another square appear on the grid, this is your impact point, where you will hit the ground if you hold you AoA constant for the rest of your descent. pressing 2 will shorten your glide (move the impact point closer to your position). your position should be off the grid for now, but you are closing quickly, so you aren't actually far away from base. tune your approach so that the impact point passes just over the target (about the squares own width), its edge should be touching/almost touching the target square. if the line runs to one side of the target, and you want to move it to the other side, press 4 or 6 on the number pad to change your bank setting. ignore the immediate change and hold a bank of 10* for at least 5 seconds to move it. when you roll back level, the line will have shifted.
22) continue your approach, constantly tuning your approach, its now safe to set your hover and thruster doors to auto, and enable your gear hydraulic pressure, if you want, tune your radio to the targets NAV assist frequencies (landing pad frequency, runway ILS, VOR etc.) and change your surface MFD to whichever MFD you will use to hone in on your specific target (HSI (and tune to VOR AND ILS) for runway landing, VTOL for vertical landing pad). if you want, set it to Map MFD and set your target, now the compass on the top of your HUD will show a pointer, that will direct you back to base if all else fails.
23) once the base comes into view, start preparing for landing, if you're doing a runway landing, go to step 24), if you're doing a hover landing, go to step 25) i find them both as hard as each other to do well, try both and see which suits you better.
24) RUNWAY LANDING:- you should have the HSI MFD open, with the left targeted to the VOR beacon of the base, and the right tuned to the runway ILS system (aviation enthusiasts will note that it isn't a FULL ILS, as it cannot fly itself ). next, slow down to 0.1x time and set your control to elevon only (use the dial near the upper left corner of the panel, if you leave it on ATM>auto it can randomly change your control to RCS, which is useless at low altitudes, so you'll be in a flying brick with NO control, this is bad). if your runway is perpendicular to your flight path, turn to one side so you can approach the base on the runway localiser (the imaginary/ILS line that runs through the centre of the runway) if you've approached right, you shouldn't have to use your engines to reach the runway, aim for a touchdown speed of a maximum of 5M/s (for realism and to avoid crashing). if you've approached at a too-shallow angle, you will need to fire a short burst of main engines to achieve the runway, if you've come in too steep, you may need to use the airbrakes (press b to toggle on/off) so you don't make a burning hole in the runway threshold. use the GPWS (Ground Proximity Warning System) callouts (if you have orbiter sound installed) to make a smooth landing. if you set your velocity indicator (circle with a plus + sign) just under the artificial horizon, you will descend slowly, helping you set up for a REALLY smooth landing. hit the brakes, and taxi off the runway, Mission complete, well done!
25) HOVER LANDING:- this is only usable if you have plenty of fuel, if you have less than 1000kg fuel, do a more efficient runway landing (better to read up on it anyway, in case you cant do a hover landing and have to use the runway) unless there is no runway at your base, in which case you need to find a field and ditch it .
.
you should have the VTOL MFD open, this gives you the information you need to land accurately. when your hull temperatures get nice and low (you should get a notification 'air intake auto opening' in your notification area) you can set yourself up for final approach. change your Aerobrake MFD to the Map MFD and zoom in so you can only see yourself and your target (target base should really be selected) NOTE: MAKE SURE YOUR RETRO DOORS ARE SET TO 'OPEN' AND HOVER DOORS ARE SET TO OPEN/AUTO (or else you will have problems later). use your compass point to set your flight path directly to base, (this makes aligning yourself easier later on) and start closing at ~250m/s (maintaining this speed uses fuel, that is why you should use the runway if you're running low) slowly reduce your speed as you get closer (you can use your Map MFD to tell you the distance). do not let your ALT drop below 3k until your VTOL MFD receives a signal and wakes up (very close distance, depends on altitude).
once it does wake up, turn your velocity component (yellow arrow) towards the target, and turn towards your target. now, load hover autopilot 'pro200spec7' and set your vertical speed to 0 before engaging. after engaging, the autopilot will level you to the horizon (you wont be perfectly level if you're travelling too fast, don't worry about this too much, as long as you can still control your vertical speed), at this point, let it control your altitude automatically, only use yaw to change direction, and if you want to, help it level out a little bit and use retro thrusters to bring the speed down. (you shouldn't have to do too much direction change at this stage).
using the DIST value on the VTOL MFD, and your speed, close in until you get closer to the pad (within the second ring), you can lower your altitude to 1k by descending at a max of -30m/s using the AP, but don't forget to level out at 1k! now set your RCS to LIN and fine tune your position above the pad (keep it within the first circle) and begin to descend at -20M/s (or -30 if you're in a hurry I suppose). as you get to 100M ALT,drop your gear and slow down to 10M/s (vertical), then reduce your speed in relation to your altitude (10M/s at 100M 9M/s at 90M and so on) until you drop to 1m/s at 10M. hold your position until you touch down, then its mission complete!
if anyone reads this and finds something missing, or doesn't understand a step in the procedure, just let me know and ill explain it further.
this is not the only way to re-enter, many people have unique methods, but i find that mine works for me (obviously). most use the same principles, and some include some pretty impressive flying, but you may find mine easier. if you don't, keep looking around, there'll be a technique that suits you somewhere.
Thanks to Tommy for reminding me about a post-deorbit alignment burn and helping to explain the Basesync normal +/- alignment process
and also thanks to Ripleyfor making me add to step 6) to clarify the annoying Basesync alignment process further
I hope this helps people!
Good luck:thumbup:
-=Grover=-
I'll try to make it all grammatically correct without any mistakes, if there's any problems, just reply to this thread or message me, and ill see what I can do.
OK, here goes!
I suggest using the DGIV-2 for this, as its autopilot can make your job much easier, and some HUD data is very useful, so for simplicity, i will assume that you already have it, if not, go here and download at least the DGIV-2 (these are good add-ons, i suggest getting all of his Add-ons, all 4 that appear at the top of this page (NOTE UMMU is included with UCGO), although, this is just my opinion)
NOTE: when I refer to the 'DGIV Display', I am referring to the screen in the middle of the panel, which has a Spacetech logo and some copyright text when you first start the scenario. any commands I give to select the mode will be given in the format 'd65', where any letter is what you should press on your keyboard, and any number you should press on the upper keyboard (not the number pad). any autopilot commands (such as changing the AoA during re-entry autopilot) MUST be pressed on the number pad (this EXCLUDES autopilot programs themselves, which are input into the console EG 'pro104spec40' these are input using the keyboard numbers, not the numpad numbers. when typing the program in, DO NOT press 'P-R-O-1-0-4-S-P-E-C-4-0', BUT RATHER "P-1-0-4-S-4-0").
1) this requires you to download the Aerobrake MFD and the Basesync MFD, here's some links to the very same that I use:
Basesync, used to align your orbit over the target base- BaseSync MFD
Aerobrake, used to calibrate your braking descent to your target base- Aerobrake MFD
(if any links don't work, let me know and ill get them working ASAP
)2) install both MFDs, and ensure that both are enabled in the "Modules" tab of the Orbiter launchpad
3) launch a suitable scenario (EG- DGIV docked to ISS), undock from anything you are docked to, and get ready to rock- open the Basesync MFD and the orbit MFD. IMPORTANT use the fuel management system to get your ships weight under 19,000KG, else your autopilot will not work later. changing the DGIV custom HUD to mode 2 gives you a large readout of ship weight, use this and your main fuel dump (CTRL+ Down arrow- on the left hand side of the panel- labelled 'Main Fuel Dump') to lose enough fuel, you MUST have less than 19T by re-entry
4) on the Basesync MFD, select TGT and enter your target destination
5) select E/D (left hand side) so that the dashed blue line is perpendicular to the yellow line.
6) accelerate time until you approach one of the nodes, then go back to 1x time ABOUT 10* BEFORE THE NODE and turn to orbit normal (depending on the symbol next to the PIC readout near the upper right corner, if it shows a + sign before the node, turn to orbit normal +, if its a - sign before the node, turn to orbit normal -. (older versions of the MFD may have a bug that causes the Tn to only apply to the LAST node passage, in which case, turn opposite to what it suggests. if you used teh above link to get the MFD, dont worry about this, the bug was fixed)
7) burn till the R-Inc value (top right corner) is close to 0, and the Dist value for the highlighted line at the bottom of the MFD is less than 10k (this is the closest distance you will pass by your target on the selected orbit)
8)go to 100x warp until the highlighted line is on line 1 (the top), then go back to 1x to program a de-orbit position
9) select DEO (lower right corner) to open the de-orbit display, then select ALT, and enter 90 into the box, then select ANT and enter 45, then select your desired entry angle (if unsure, enter 0.7)
10) you now have your de-orbit position, this will be correct for your current altitude BUT YOU MUST HAVE A LOW ECC VALUE BEFORE YOU CAN RELY ON THE POSITION (keep it less than 0.05 ideally) time warp to the position
11) as you approach, open the DGIV's de-orbit display (press d then 2 on your keyboard) and turn retrograde to prepare to de-orbit
12) as you pass the white line on the de-orbit display, begin to burn your main engines, watch your PeA (or PeD, I forget :S) and make sure it is decreasing, or else you are burning prograde or normal, you want neither of these.
13) once your orbit on the orbit MFD hits the atmosphere, the entry angle on the central display will rapidly count upwards, stop as close as you can to 0.7, then use lin thrusters (RCS- press numpad /, then numpad 6 or 9) to fine tune it, use CTRL-[direction] for ultra fine tuning. it doesn't matter if you're a little out, but its best to be exactly on it to reduce your total error margin.
turn off the De-orbit display (press DEO) again and time warp until you approach the final node before landing, this is the node 90* from your target, usually ~90* from your de-orbit position. then you should re-align your flightpath, turning to orbit normal or anti-normal (as required) and burning until the DIST readout on the highlighted line (MUST BE THE TOP LINE AT THIS STAGE) is close to 0.
14) engage surface HUD, engage prograde, then MANUALLY level out and pitch up to ~40* (the autopilot manages to use a huge amount of fuel if you just skip to the next step)
15) press d1 to return to the program display on the DGIV display, then press c to unload your previous program. next use autopilot 'pro104spec40' (or press p104s40 <enter> on your keyboard) then hit e.
16) your autopilot will automatically set your angle of attack to 40*, this is how you will stay to about 68KM ALT (but don't time warp there yet).
17) change the right MFD to surface (yes, surface) so you can see your speeds and accelerations, and change the DGIV display to re-entry check (press d65). this will tell you everything you need to do before re-entry (most important are: nosecone being open, excess weight, but others still need to be done)(if you are over max entry weight, you didn't dump enough fuel, do it NOW!)
18) continue running the auto checklist (d65) and correcting and mistakes in your configuration till you get 'configuration OK' message, then set the display to re-entry data (d3)
19) time warp forward till the DGIV autopilot says you cant use time warp anymore, set your left MFD (not the one currently set to 'surface') to Aerobrake MFD and set the target to the target you defined for the Basesync, then wait till you drop to 70km ALT, this is when you start to control your descent.
20) use the autopilot to keep your descent rate as close as possible to -80M/s Vertical speed. i use the VACC (vertical acceleration) to do this. by pressing 8 (numpad) the vertical speed (and acceleration) moves upwards as you pitch down (more lift generated by the wings), and as you press 2 (numpad)you descend faster, as less lift is generated by the wings. the re-entry display tells you the atmospheric pressure, the higher this is, the more effective your airfoils, and so you should find that you pitch down gradually throughout the descent
NOTE the DGIV autopilot currently only works in 5* steps for the angle of attack (AoA), this is far too much for a smooth entry, you will find that you have to repeatedly move between two values to keep your speed from changing too much.
if your vertical speed gets lower than -90M/s, your hull will heat dramatically in a few minutes time, and if you notice this heat rise, its probably too late to fix it. alternately, if your vertical speed rises as high as -60M/s, you are in danger of bouncing off the denser layers of the atmosphere as you hit them, ruining your good de-orbit position. aim to keep it between -70 and -80, this keeps you on a good enough trajectory. it doesn't need to be perfect, because the final step in this process ensures that you go over your target.
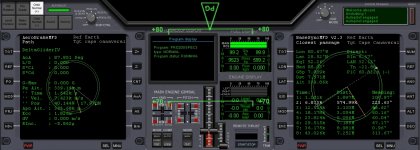
21) keep this target descent rate until you notice your speed reach around 2K M/s (Mach 6) at this point, pay close attention to your Aerobrake MFD, this is all you will use for your final approach to target. looking at the grid in the upper right corner (if you have a display with the earth and your path in relation to a cross section, press PRJ and PG to obtain the map view, if you still dont have it, press PG until your top line reads "Graph/Map" then press PRJ untill a map view appears), it shows your target as the central square, and each Gray grid square us roughly 120km over the surface. pressing 8 (numpad) will extend your glide further, do this until you see another square appear on the grid, this is your impact point, where you will hit the ground if you hold you AoA constant for the rest of your descent. pressing 2 will shorten your glide (move the impact point closer to your position). your position should be off the grid for now, but you are closing quickly, so you aren't actually far away from base. tune your approach so that the impact point passes just over the target (about the squares own width), its edge should be touching/almost touching the target square. if the line runs to one side of the target, and you want to move it to the other side, press 4 or 6 on the number pad to change your bank setting. ignore the immediate change and hold a bank of 10* for at least 5 seconds to move it. when you roll back level, the line will have shifted.
22) continue your approach, constantly tuning your approach, its now safe to set your hover and thruster doors to auto, and enable your gear hydraulic pressure, if you want, tune your radio to the targets NAV assist frequencies (landing pad frequency, runway ILS, VOR etc.) and change your surface MFD to whichever MFD you will use to hone in on your specific target (HSI (and tune to VOR AND ILS) for runway landing, VTOL for vertical landing pad). if you want, set it to Map MFD and set your target, now the compass on the top of your HUD will show a pointer, that will direct you back to base if all else fails
.23) once the base comes into view, start preparing for landing, if you're doing a runway landing, go to step 24), if you're doing a hover landing, go to step 25) i find them both as hard as each other to do well, try both and see which suits you better
. 24) RUNWAY LANDING:- you should have the HSI MFD open, with the left targeted to the VOR beacon of the base, and the right tuned to the runway ILS system (aviation enthusiasts will note that it isn't a FULL ILS, as it cannot fly itself
). next, slow down to 0.1x time and set your control to elevon only (use the dial near the upper left corner of the panel, if you leave it on ATM>auto it can randomly change your control to RCS, which is useless at low altitudes, so you'll be in a flying brick with NO control, this is bad). if your runway is perpendicular to your flight path, turn to one side so you can approach the base on the runway localiser (the imaginary/ILS line that runs through the centre of the runway) if you've approached right, you shouldn't have to use your engines to reach the runway, aim for a touchdown speed of a maximum of 5M/s (for realism and to avoid crashing). if you've approached at a too-shallow angle, you will need to fire a short burst of main engines to achieve the runway, if you've come in too steep, you may need to use the airbrakes (press b to toggle on/off) so you don't make a burning hole in the runway threshold. use the GPWS (Ground Proximity Warning System) callouts (if you have orbiter sound installed) to make a smooth landing. if you set your velocity indicator (circle with a plus + sign) just under the artificial horizon, you will descend slowly, helping you set up for a REALLY smooth landing. hit the brakes, and taxi off the runway, Mission complete, well done!25) HOVER LANDING:- this is only usable if you have plenty of fuel, if you have less than 1000kg fuel, do a more efficient runway landing (better to read up on it anyway, in case you cant do a hover landing and have to use the runway) unless there is no runway at your base, in which case you need to find a field and ditch it
.you should have the VTOL MFD open, this gives you the information you need to land accurately. when your hull temperatures get nice and low (you should get a notification 'air intake auto opening' in your notification area) you can set yourself up for final approach. change your Aerobrake MFD to the Map MFD and zoom in so you can only see yourself and your target (target base should really be selected) NOTE: MAKE SURE YOUR RETRO DOORS ARE SET TO 'OPEN' AND HOVER DOORS ARE SET TO OPEN/AUTO (or else you will have problems later). use your compass point to set your flight path directly to base, (this makes aligning yourself easier later on) and start closing at ~250m/s (maintaining this speed uses fuel, that is why you should use the runway if you're running low) slowly reduce your speed as you get closer (you can use your Map MFD to tell you the distance). do not let your ALT drop below 3k until your VTOL MFD receives a signal and wakes up (very close distance, depends on altitude).
once it does wake up, turn your velocity component (yellow arrow) towards the target, and turn towards your target. now, load hover autopilot 'pro200spec7' and set your vertical speed to 0 before engaging. after engaging, the autopilot will level you to the horizon (you wont be perfectly level if you're travelling too fast, don't worry about this too much, as long as you can still control your vertical speed), at this point, let it control your altitude automatically, only use yaw to change direction, and if you want to, help it level out a little bit and use retro thrusters to bring the speed down. (you shouldn't have to do too much direction change at this stage).
using the DIST value on the VTOL MFD, and your speed, close in until you get closer to the pad (within the second ring), you can lower your altitude to 1k by descending at a max of -30m/s using the AP, but don't forget to level out at 1k! now set your RCS to LIN and fine tune your position above the pad (keep it within the first circle) and begin to descend at -20M/s (or -30 if you're in a hurry I suppose). as you get to 100M ALT,drop your gear and slow down to 10M/s (vertical), then reduce your speed in relation to your altitude (10M/s at 100M 9M/s at 90M and so on) until you drop to 1m/s at 10M. hold your position until you touch down, then its mission complete!
if anyone reads this and finds something missing, or doesn't understand a step in the procedure, just let me know and ill explain it further.
this is not the only way to re-enter, many people have unique methods, but i find that mine works for me (obviously). most use the same principles, and some include some pretty impressive flying, but you may find mine easier. if you don't, keep looking around, there'll be a technique that suits you somewhere.
Thanks to Tommy for reminding me about a post-deorbit alignment burn and helping to explain the Basesync normal +/- alignment process
and also thanks to Ripleyfor making me add to step 6) to clarify the annoying Basesync alignment process further
I hope this helps people!
Good luck:thumbup:
-=Grover=-
Last edited:

") - I did the alignment burn at point 13, though), I just watched the vertical speed and tuned it at about 70 m/s.
- I did the alignment burn at point 13, though), I just watched the vertical speed and tuned it at about 70 m/s.