Finished campaign mission 4. Another recon mission this time. Lost hydraulics to a MANPAD early on, but it didn't seem to be causing too many problems so I kept going.
Wingman's performance...well, see any previous report. Same old same old.
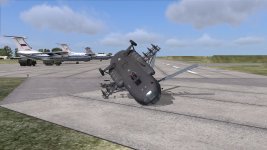
While I was turning around to make another pass, I lost aileron control and ended up upside down heading for the water. Oops. Was able to eject safely. Hope there's some kind of personal floatation device in the ejection kit.
On the bright side, I didn't have to worry about landing!
Was able to finish the mission objectives (not really sure what all they were, but I visited all the recon waypoints and took out a few SAMs, MBTs, APCs, and trucks). I neither took out all of the available targets at each waypoint, nor did I take out all of the targets shown on the map, so I have no idea what exactly constitutes 100% completion, but apparently I hit it. Also, I apparently earned a promotion to first lieutenant...
---------- Post added 10-28-13 at 01:08 ---------- Previous post was 10-27-13 at 21:30 ----------
Campaign mission 5 complete. This was another of those "take out a target in the back of the enemy lines" missions, where the friendly ground forces aren't advancing and I'm basically on my own.
Primary target was a mobile command post, which I located (after an initial SAM/MANPAD sweep) and took out without much difficulty, along with the other vehicles in its group (per the map). Got a message saying something along the lines of the primary target having been eliminated, so I proceeded to take out anything else that looked expensive--SAMs/Shilkas getting first priority, of course. Ended up bagging a bunch of MBTs and artillery, a few APCs, and a couple of trucks.
Had a bit of cannon ammo left at the end, but was running low on fuel so I returned to base anyway. Landing was probably my best so far, despite a crosswind. I used the method I picked up in the L-39 in FSX -- while on approach, keep the throttle up (~65% in the SU-25T seems to work) and the airbrakes out. Not the most fuel efficient, but gives you good options when your speed starts going one way or the other.
Not sure what I missed, but the mission result was only 91%. I really don't like how vague they are about what needs to get done--my campaign average is now down to 99% instead of the perfect 100 I had before

Guess in the future I'll need to reload/refuel and go back out again to KILL EVERYTHING. Nuke it from orbit--it's the only way to be sure.
As an example, the next mission has in the briefing "Fly to the three designated points and engage enemy forces as needed to complete your mission." Well, WTF does that mean? I wish it was more specific as to what needed to get done.
Wingman did his usual "take out one SAM, get shot at multiple times" performance, but this time around he managed to limp back to base on one engine, so I guess I'll get to keep the same guy through the next campaign mission. Damn, I was hoping I'd get a new one who would be smart...
Next mission is again of the recon type, with a fairly target-rich environment, and according to satellite surveillance (the mission planner) lots of SAM sites close together. I think I'll take a different tactic with wingman management this time around. He seemed to do okay at surviving when he was just following me around before I realized I needed to order him to shoot stuff, so I think I'll try keeping him passive while I take out most of the SAM sites/MANPADs, then I'll let him loose. He can't be trusted on the SAM sites himself since he doesn't understand how to stay out of range. However, I can't really take over the SEAD role entirely for the inevitable SA-8 Osa, since I'd need to drop either the Kh-29Ts or the Kh-25MLs, both of which I rely on to take out MANPADs from a safe distance... Of course, I could always drop the Vikhrs for a Kh-25MPU, but that just seems silly--I wish I could fill all my hardpoints with Vikhrs, they're fantastic.
I think I'll give the wingman the SEAD equipment (as usual) for the Osa and Shilkas, approach over the water until we get the Osa on radar while staying well away from the rest of the SAMs. Order the wingman to engage air defenses until he launches at the Osa, then order him to rejoin formation while I pick off the remaining SAM sites & MANPADs.
Has anyone else found a good "wingman management" strategy? I think that keeping him alive through the initial part of the engagement would be a fantastic way to ensure more enemy stuff gets dead, helping to ensure that I reach 100% results...
") I was trying to loft bomb it with a couple of FAB-500's. Serves me right for trying delivery methods the aircraft was not designed for. Time to start the campaign, I believe.
I was trying to loft bomb it with a couple of FAB-500's. Serves me right for trying delivery methods the aircraft was not designed for. Time to start the campaign, I believe.